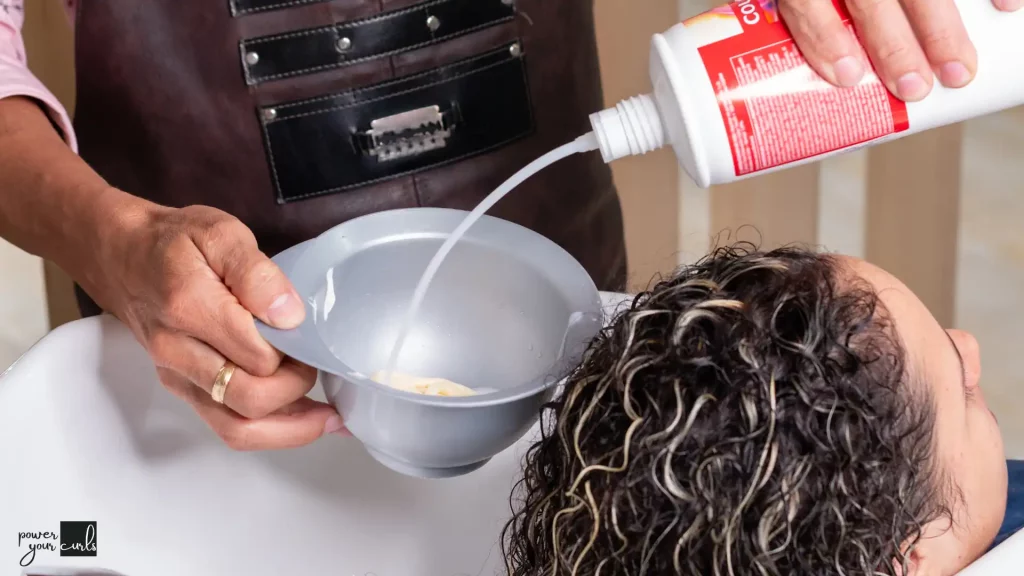
Dyeing curly hair presents some unique challenges, but the results are totally worth the extra effort when you nail a flattering, multi-dimensional shade that makes your ringlets radiate vibrancy. Are you ready to take the curly color plunge? From preparation to aftercare, these pro tips will ensure your dyed curls look lusciously vibrant for months.
Why Coloring Curly Locks is Trickier (But Totally Worth It)
Let’s be real – dyeing curly hair is not quite as straightforward as coloring straight strands. The very qualities that make curls so gorgeous – their unique pattern, texture, and porosity differences – also make them trickier to color evenly. Curly hair tends to be drier and more porous than straight hair, so the color molecules penetrate and lift the cuticle differently.
What’s more, your curl pattern variations mean some sections may process color faster than others, leading to uneven, patchy results if you’re not careful. But don’t let that deter you! With the right preparation and application, you can rock multi-dimensional, vibrant curly colors that will make you feel like a total boss.
Preparation is Key for Curly Hair Color Treatment
Start with Healthy, Moisturized Curls
One of my top tips? Always start the dyeing process with fresh, clean, properly moisturized curls. A few days before your color appointment (or at-home session), give your curls an ultra-nourishing deep conditioning treatment to replace any lost moisture and strengthen the cuticle. You’ll also want to clarify thoroughly to remove any product buildup that could create a barrier. Finally, take the time to completely detangle your curls – either in the shower or once dry – using a deep conditioner or safe detangling spray and a wide-tooth comb or Denman brush. Stretched, smooth curls allow for more even color saturation from roots to ends.
Match Your Curl Pattern to the Right Dye Formula
Not all hair color formulas are created equal when it comes to curly hair. Those with looser wave patterns may be able to get away with semi-permanent dyes, which deposit color only (no ammonia lift). But for curlier textures, you’ll likely need to use a permanent professional color with an alkaline agent like ammonia or ethanolamine to first open up the cuticle. Your stylist can help determine the optimal developer volume based on your curl type and hair porosity levels – tighter curls and highly porous strands require lower volumes to minimize damage and color shifting.
get a Curl-Specialized Colorist to do the job

When it comes to coloring curly hair, you’d want someone familiar with the uniqueness of type 3 hair patterns and above.
Experienced curly colorists will know which brands and formulas work best for different curl types and porosities. They can analyze your hair’s elasticity and gauge appropriately whether to use lifting or deposit-only colors.
The Pre-Color Detox and Strand Test
No matter who is doing your color, about a week before your appointment, give your curls a detox with a chelating shampoo to remove any product buildup or mineral deposits that could create boles and prevent even saturation.
You’ll also want to do a strand test, ideally on hair from your curliest under-layers. Your stylist can apply your desired color formula here first to check for any unexpected warmth, ashiness, or porosity issues before doing your whole head.
Another smart move? Get some professional insight into your curl pattern’s unique elasticity and texture. An experienced stylist can analyze how your curls stretch and bounce back, which impacts how quickly they’ll process color. They can customize the volume of developer needed based on your elasticity levels – using lower volumes like 10 or 20 on overly porous, zigged strands to prevent over-lifting and damage.
Coloring Curly Hair Right – Pro Tips That Deliver
Application Technique Matters
Even with the right dye formula, the application technique is crucial for even curl saturation. Instead of just painting color on top as you might with straight hair, you’ll want to start by applying color at the back and underneath sections first. This ensures the curliest, most stubborn areas that tend to be last to process get maximum exposure time.
Then work in quadrants, saturating each section of curls thoroughly from roots to ends with your gloved hands or a tinting brush. An applicator bottle can also help ensure 360-degree coverage, especially on the top layers.
Processing Time and Curl Clumping
While your curl type determines your optimal overall processing time, don’t just set a timer and walk away! Curly hair often processes color faster due to its increased porosity. So you’ll want to keep checking the sections you started with first, looking for any hot spots or uneven patches to apply a buffer or rinse out early if needed. During processing, lightly clumping or coiling your curls can also help ensure even saturation from roots to ends. When it’s time to rinse, use cool water which helps reseal and smooth the cuticle for maximum color vibrancy.
The Aftercare Routine That Makes your color-treated Curls Flourish
Reset Your Routine for Color-Treated Curls
You’ve achieved your dream dyed curly hair shade – now it’s time to switch up your routine to make that color last! First, swap out any shampoos or stylers containing sulfates or harsh cleansers that can strip away your fresh color. Opt for a color-safe, sulfate-free system designed to be gentle on processed hair. Weekly deep conditioning treatments are also an absolute must to replenish the moisture and oils that coloring depletes.
When it comes to heat styling, think low and slow (if you must), and always use a thermal protectant spray or cream to guard against damaging your delicate curls.
Refreshing Your Vibrant Curly Color at Home
Between salon appointments, you can help refresh vibrancy and tone with some easy home treatments. Temporary color-depositing masks and even some tinted dry shampoos can revive fading color and brighten highlights.
If you have red or auburn shades, henna is a great natural option for a subtle refresh – just be sure to do a strand test first. For camouflaging re-growth at the crown and hairline, I’ve found tinted powder or spray root touch-up products specially formulated for curly hair that can buy you an extra few weeks between coloring sessions.
Protecting Your cuticles from losing Color at Night
Chances are, you invest a decent amount of time and money into maintaining your curly color. So why undo all that hard work by smooshing and rubbing your freshly dyed ringlets into a cotton pillowcase night after night?
To prevent color transfer and minimize friction, swap out your pillowcases for silk or satin ones. The smoother surface helps curls retain their shape and definition while protecting the cuticle from roughing up. You can even snag an affordable satin bonnet or headscarf for extra insurance.
Remember, caring for your newly dyed curly hair is all about finding the right balance of moisture, protection, and definition. Embrace your natural texture, be gentle with your strands, and your curls will reward you with a vibrant, bouncy, and frizz-free mane that turns heads wherever you go.
Frequently Asked Questions
How Often Should I Really Be Re-Dyeing?
Your fresh, vibrant shade will begin fading and get dull much faster than someone with straight strands. Plan on a professional re-dyes every 6-8 weeks to revive your roots and refresh your tone if you want to maintain that fresh-from-the-salon look. Stretching the past 10 weeks is really pushing it for most curl types.
How often should I wash my dyed curly hair?
Aim to wash your hair every 3-4 days, or as needed based on your activity level and hair type. Too much washing can strip your color and dry out your curls, while not washing enough can lead to buildup and dullness.
Is My Curl Pattern Going to Change After Coloring?
In short – possibly, at least temporarily! Any chemical process has the potential to affect your curl pattern and texture somewhat. Some curlies notice their texture feels a little rougher or dryer post-dye, while others see their curl pattern actually get looser and stretched out until the new growth comes in fully. That’s why doing regular deep conditioning treatments is so crucial – to help minimize texture shifts.
